- Published on
- Updated on
Moving Photos from Android to PC: Step-by-Step Guide
- Authors
Many phones store photos, which often take up the majority of their memory. Keep in mind that images are usually stored in high-quality JPG or uncompressed RAW format. This leads to a lack of memory on phones and SD cards, which is a common complaint from Android users.
One solution to this problem is to move files from your device's memory to another storage device or the cloud. There are several ways to do this. Today, we’ll discuss the most convenient methods, helping you save time and avoid the frequent "low storage" complaints from your Android device.
Here are the main ways you can copy photos from your phone to your computer:
Table of Contents
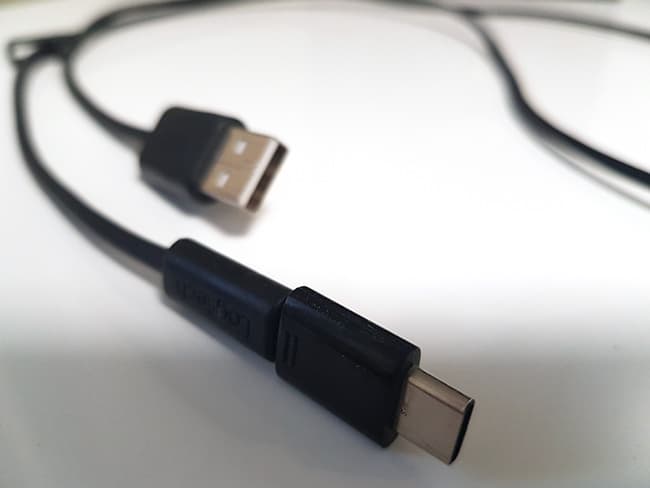
Transfer Photos Through a USB Cable
You’ll need a USB cable (which comes with your phone) to move pictures from your phone to your computer.
How to Move Photos to a PC via a USB Cable:
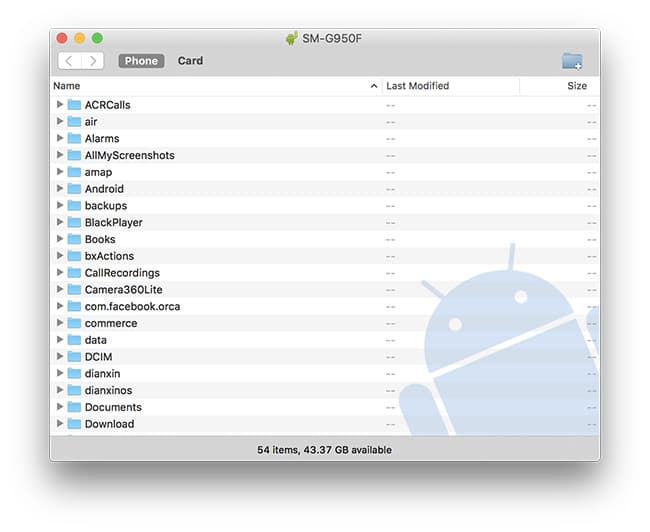
- After connecting your phone to the USB port of your computer, make sure the correct file transfer mode is enabled on the phone. When the “Use USB for” dialog appears, select "Transfer media files".
- Once connected, you’ll see a new drive in Windows Explorer (This PC) or another file manager in the “Devices and drives” section.
- Open the photo folder (usually DCIM), then move its contents to your PC by selecting the files (hold Ctrl or Shift as needed).
Note: We strongly advise against using “Cut” (Ctrl + X) to move important files. A random error during transfer could result in lost photos and videos. Use Copy-Paste (Ctrl + C), and only delete the files from your phone once you’ve confirmed they appear correctly on your PC.
If you use Mac OS instead of Windows, you’ll need the Android File Transfer program to transfer files via USB.
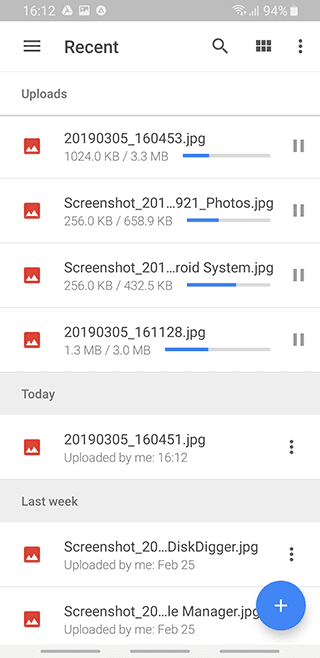
Syncing Media and Importing Pictures via Google Photos
Google Photos is a convenient Android app for accessing the Google Photos service. Here are its main advantages:
- Google Photos automatically syncs and stores all photos and videos taken by your camera online.
- This app is available for both desktop and mobile devices.
- You can view photos through a browser, no matter where you are.
- Google Photos, along with Google Drive, ensures your photos are backed up and protected from data loss.
- There's no need to perform any manual file operations, as Google Photos runs in the background.
- The free storage space is practically unlimited (photos can be up to 16 megapixels in size).
How to Transfer Pics via Google Drive
You don't have to connect your phone to your computer via USB to transfer photos and other files. Any cloud service, like Google Drive, can handle this for you. This is why Google Drive is so convenient—it allows you to back up all types of files (unlike Google Photos, which only stores multimedia).
The free storage space on Google Drive is limited to 15 GB, but you can purchase additional space. For most users, the free space is sufficient for transferring files between your phone and PC.
Google Drive comes pre-installed on most Samsung Android phones, but it can also be downloaded from Google Play. You can view and copy photos to your desktop via the Backup and Sync program, which is available for both Windows and Mac OS. Additionally, all file operations can be done directly through the browser at https://drive.google.com.
Step-by-Step Process:
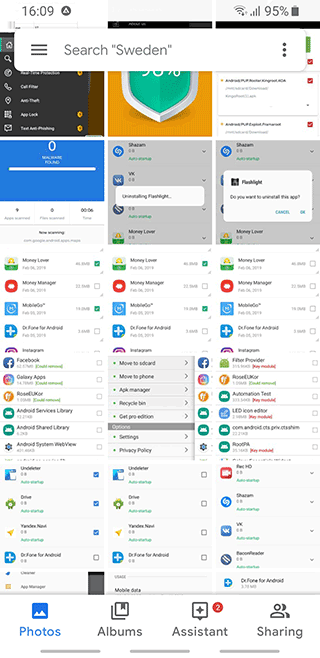
- Go to your Android Gallery.
- Select the files you want to copy to your PC.
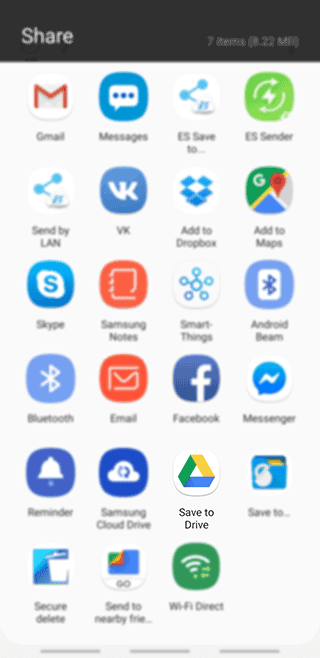
- Tap the "Share" button and select "Save to Drive" from the menu.
- Wait until the copying is completed (you can track the status through Android notifications).
- The photos will be stored on Google Drive until you decide to delete them.
It’s also helpful to set up automatic syncing of your photos via Google Drive. In the app settings, choose the “Google Photos” option. Additionally, setting up backup copying is a good decision for ensuring your files are always safe.
Moving Photos to a PC via a Card Reader and Memory Card
Unlike iOS devices, Android phones support microSD cards, allowing you to expand your phone's memory. This is a convenient and affordable way to store data and transfer it to portable devices and PCs.
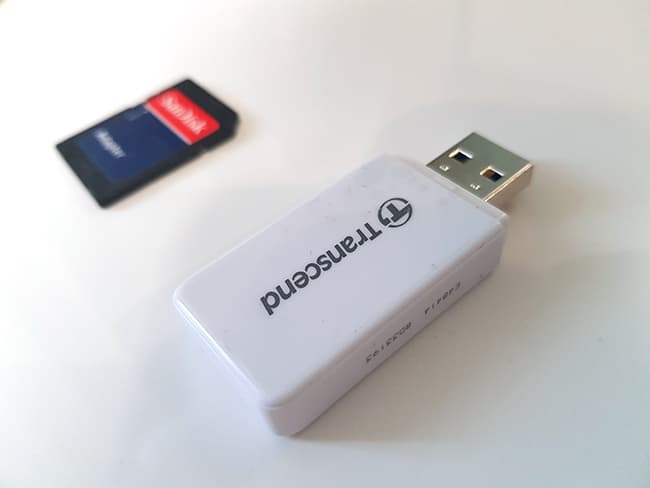
Another option for transferring photos is to use a card reader and an SD card. Ideally, the photos should already be stored on the memory card, and the card reader should be built into your laptop or MacBook. If not, follow these steps:
Copy the photos to the memory card using any file manager on your phone.
Remove the memory card from the phone.
Connect the card reader to your PC via USB or use the built-in reader (if available).
Open the connected memory card in File Explorer.
Copy the photos to your computer.
Tip: To simplify this process in the future, go to your Camera app settings and set the photo storage location to the SD card (if it's connected).
Conclusion
As you can see, there are multiple ways to transfer photos from your Android phone to your PC without unnecessary steps. If you encounter any difficulties or have suggestions to improve this guide, don't hesitate to contact us. We're always happy to receive feedback!
Result: 0, total votes: 0

I'm Vladimir, your guide in the expansive world of technology journalism, with a special focus on GPS technologies and mapping. My journey in this field extends over twenty fruitful years, fueled by a profound passion for technology and an insatiable curiosity to explore its frontiers.